
News & Article

Formwork Stripping Cycles: Using Drop-Head Systems to Speed Concrete Pours

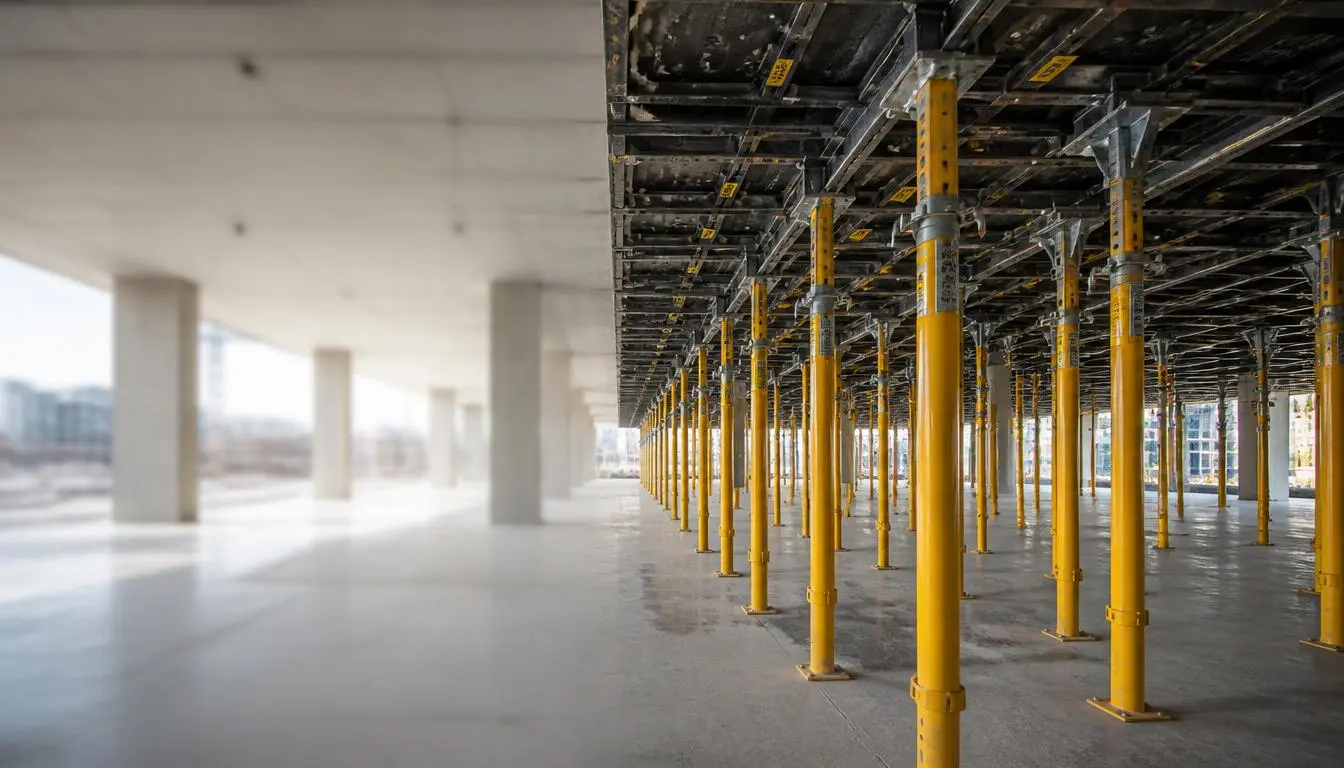
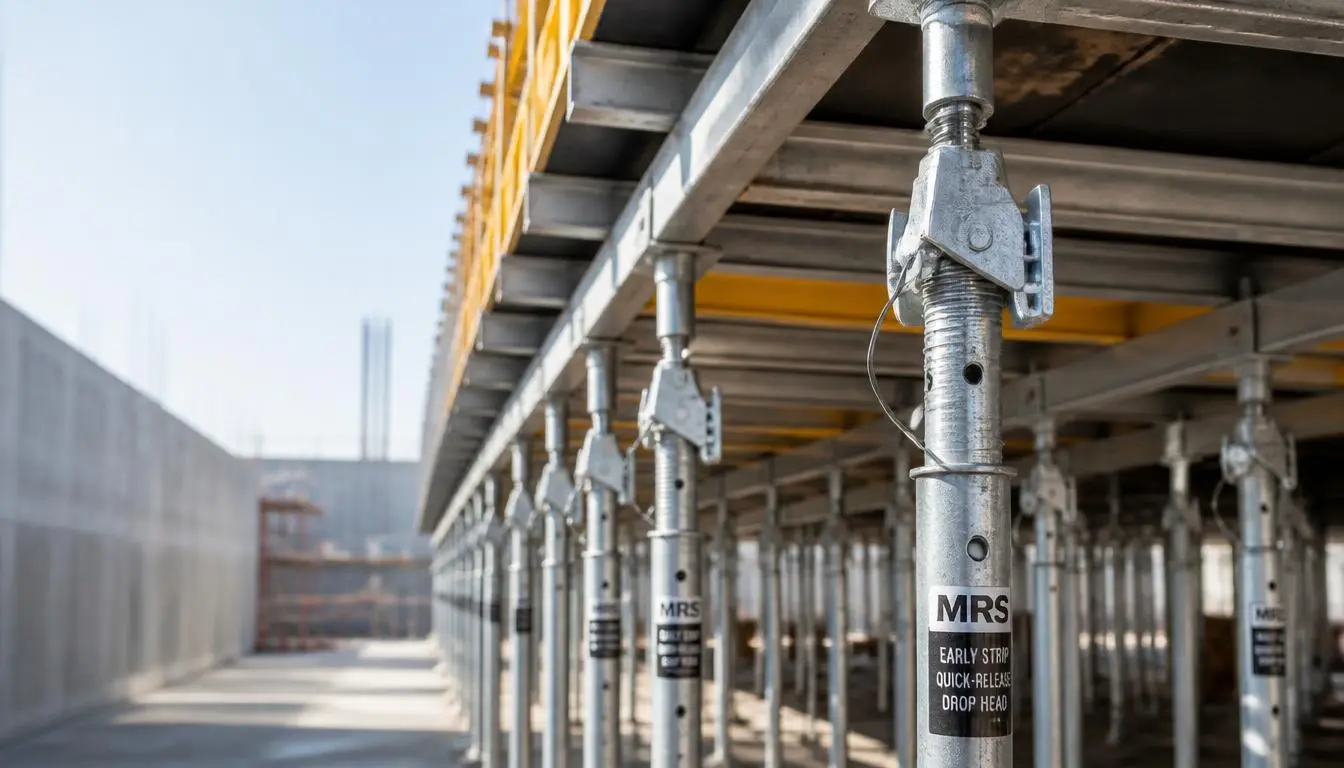
Managing your formwork stripping time as per IS 456 rules is the true secret to keeping a building project moving fast without risking structural safety. Stripping under-slab supports too early can cause cracks, but leaving equipment locked in place for weeks stalls your team and drives up rental bills. By utilizing an early stripping shoring system equipped with quick-release drop-head components, contractors can safely reclaim their plywood sheets just days after a pour. This guide explains how to blend concrete curing timelines with modern drop-head mechanics to optimize your layout safely. The Curing Timeline: Navigating Formwork Stripping Time as per IS 456 Knowing the exact timeline for removing framework is not about guessing a random date on a calendar; it is about tracking concrete maturity. When you pour fresh concrete, the chemical reaction generates heat, causing the material to harden and build structural strength over several days. Stripping your framing before the mix reaches its minimum design strength causes long-term structural deflection. The type of cement you choose changes this timeline entirely. For instance, using traditional Ordinary Portland Cement (OPC) allows for a quicker strength-gain curve, meaning you can drop your panels much faster. However, modern projects often blend in fly ash or slag, like Portland Pozzolana Cement (PPC), which slows early-strength development. If your site team does not adjust their schedule for these slow-curing mixes, stripping the deck prematurely will cause structural sagging risks. To see how these curing timelines integrate with your broader scaffolding plans on site, read through our comprehensive guide on Slab Formwork Scaffolding Rental Bangalore Systems. Slab Concrete Deshuttering Periods: Props vs. Soffit Panels A common point of confusion on jobsites is the difference between removing immediate overhead sheets and removing the main vertical weight-bearing props. Under Indian standard specifications, the minimum stripping time for concrete slab formwork is split into two distinct stages: Slab Soffit Panels (Molds/Deck Sheets): 3 Days. You can safely remove the horizontal panels or plywood face sheets after 3 days, provided the primary props are left undisturbed. Slab Props (Spans/Vertical Shores): 7 to 14 Days. For clear structural spans up to 4.5 meters, vertical props must stay in place for 7 days. For wide spans exceeding 4.5 meters, props must remain locked for 14 days. This dual timeline creates an excellent early strike window. By separating the horizontal deck face sheets from the primary vertical shores, you can slide out your expensive plywood panels just 72 hours after a pour. The structural slab remains completely safe because the primary vertical props stay under the heavy span, bearing the weight while the concrete continues to cure. The Mechanics of Speed: How Drop-Head Systems Accelerate Pours A modular early stripping shoring system changes the way a crew strips a concrete deck. Traditionally, to get your plywood sheets down, you had to drop the entire vertical scaffolding structure. This old approach forced you to leave thousands of rented props locked under a single floor for weeks. Modern drop-head scaffolding components solve this bottleneck through a clever release design. The drop head sits directly on top of your heavy-duty vertical shoring prop. When you strike the quick-release wedge pin with a hammer, the outer collar of the head drops down by roughly 60mm to 100mm. This lowers the primary horizontal beams and plywood panels away from the concrete ceiling, while the main inner shoring post stays tightly wedged against the concrete slab. This drop head scaffolding quick release mechanism allows you to safely remove your horizontal framing without disturbing the main vertical load-bearing path. By keeping the main shoring posts untouched, the curing slab never loses its critical center support. To see how these vertical shores connect with high-capacity horizontal bridging components during assembly, check out our field overview on Acrow Span Rental Bangalore Solutions. How to Reduce Formwork Cycle Times Safely Learning how to reduce formwork cycle times safely is the fastest way to slash your equipment rental costs. When your crew utilizes a drop-head layout, you can establish a highly efficient shuttering panel rotation line. Instead of keeping a massive inventory of scaffolding locked up on a single floor, you only need enough horizontal decking sheets to cover one or two floors. On day three, your workers strike the drop-heads, slide out the horizontal beams and plywood panels, and immediately move them up to form the next level. This smart asset velocity dramatically cuts down your total scaffolding material rental Bangalore requirements. Your vertical shoring props stay downstairs supporting the curing concrete, while your high-cost horizontal panels work around the clock on upper decks. Common Errors: Stripping Blended Cements Prematurely Without Cube Tests A frequent mistake made by site supervisors is blindly applying the minimum calendar days for stripping without verifying the actual concrete mix design. The 3-day and 7-day timelines in standard charts assume you are using traditional OPC. However, modern sustainability rules mean most commercial sites now use PPC or mixes blended with heavy amounts of fly ash and ground granulated blast-furnace slag (GGBS). Blended eco-cements significantly slow down the early hydration speed of your concrete. While an OPC mix might hit 70% of its target strength within a week, a high-volume PPC blend might only reach 45% to 50% strength in that same window. If a crew applies standard timelines to a slow-curing PPC mix without checking, the under-developed slab will suffer. To avoid this danger, never rely solely on a wall calendar. You must cast companion concrete cubes right alongside your main floor pour. These sample cubes must cure in the exact same field conditions as your actual floor slab. Before anyone strikes a drop-head pin or removes a vertical support span, a technician must run a compression concrete cube test in the site lab to verify that the slab has physically crossed its required safety milestone. FAQs: Managing Concrete Shuttering Cycles Do modular drop-head systems work with traditional wooden props or local bamboo poles? No, drop-head scaffolding components require a stable, precision-engineered metal framework to operate

Read More »

Acrow Spans & H-Beams: Heavy-Duty Deck Support Spacing Calculations

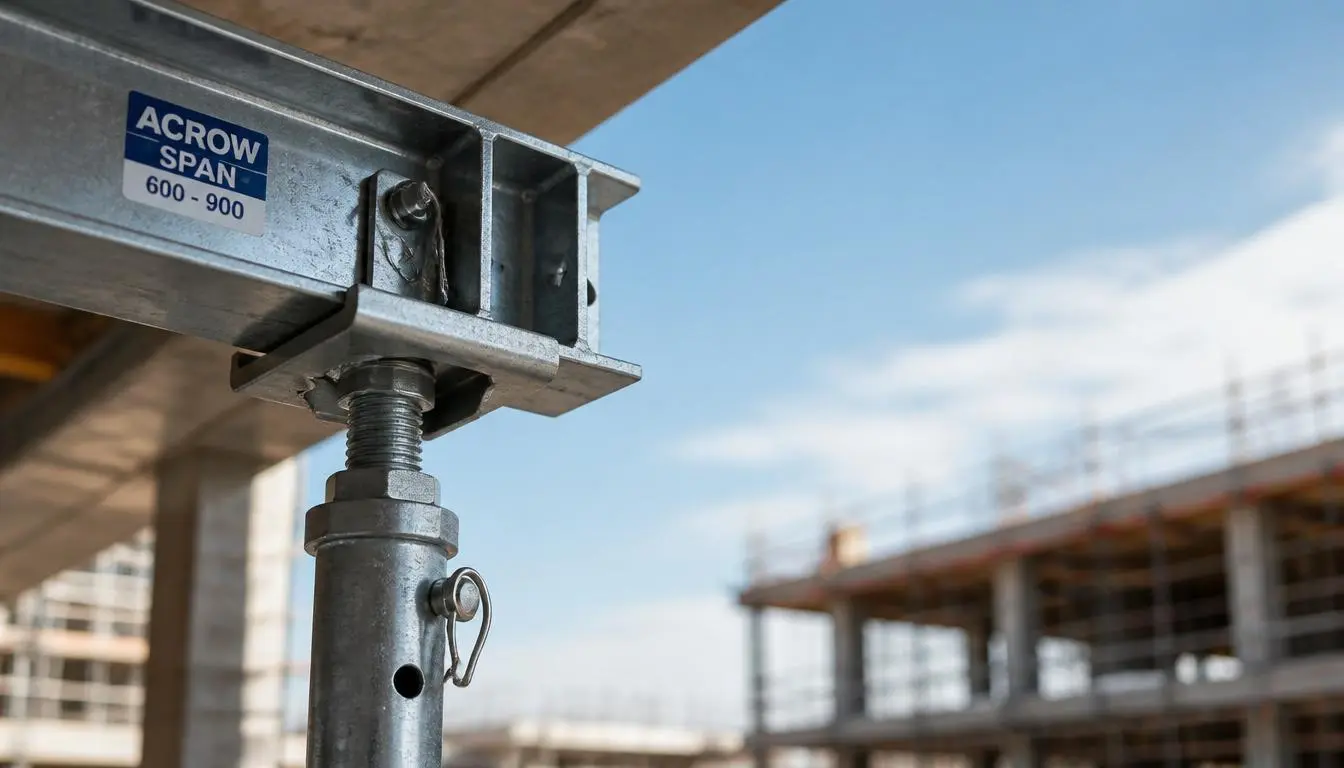
Setting up a reliable deck support layout is a highly precise step in concrete formwork installation. While vertical staging elements bear the weight downward to the solid ground, your horizontal components form the immediate structural bridge underneath the ceiling shutters. Securing a reliable Acrow span rental Bangalore fleet provides your site team with rigid, telescoping steel beams built to handle clear span lengths across distant props. These primary horizontal units support the heavy slab centering sheet support system, keeping the temporary platform flat and secure under heavy wet concrete loads. [Wet Concrete Mix] ──> [Centering Sheets / Plywood] ──> [Horizontal Acrow Spans & H20 Beams] ──> [Vertical Props] When liquid concrete drops from a pump line, it creates a massive dynamic horizontal ledger load that spreads rapidly across your framing. If your horizontal beams do not match this weight path, the shuttering sheets will flex and slide out of line. This shifting distorts the under-face of your slab, resulting in an uneven ceiling line that requires expensive concrete grinding work to fix later. By linking adjustable steel spans with high-quality engineered timber H-beams, you create a rigid horizontal runway that handles high-tonnage concrete pours without shifting. To see how these horizontal bridging components link up with your main vertical layout plans, check out our master overview of Slab Formwork Scaffolding Rental Bangalore Systems. Understanding the Mechanics of Adjustable Steel Spans To build a safe horizontal staging layout, your site engineers must understand how a telescoping beam handles heavy weights. A standard adjustable steel span uses a dual-member design, featuring an outer member sleeve and an inner sliding channel that slides out to match the required clear gap between your walls or vertical props.                  ┌────────────────────── OVERLAP ZONE ──────────────────────┐                   │                                                          │    Outer Member Sleeve (Larger Pipe)                            Inner Sliding Channel (Smaller Box)   ━━━━━━━━━━━━━━━━━━━━━━━━━━━━━━━┓                              ┏━━━━━━━━━━━━━━━━━━━━━━━━━━━━━━━                                  ┃  ●  [High-Tensile Lock Pin]  ┃    ───────────────────────────────┸──────────────────────────────┸───────────────────────────────   ▲                                     [Max Deflection Point]                                 ▲ [End Bearing]                                                                              [End Bearing] While this telescoping design makes the hardware highly versatile on the job site, extending the inner sliding channel reduces the overall maximum load capacity of adjustable steel spans. As the beam is pulled out toward its maximum length, the central overlap zone shortens, which lowers its cross-sectional stiffness. This structural change leaves the extended beam vulnerable to bending moment deflection right at its weakest center point. For example, a standard 2.5-meter steel span can easily support a heavy structural load when kept at its minimum closed length. However, if you extend that same component out to a wide 4.0-meter span, its safe weight-bearing threshold drops by nearly 40%. If your framing layout fails to account for this change, the dynamic downward force of a wet concrete pour will cause noticeable mid-span bowing. The Spacing Blueprint: How to Calculate Acrow Span and Beam Intervals Determining your horizontal grid layout requires looking at the total weight of your concrete floor. To learn how to calculate spacing for Acrow spans in slab casting, you must match the thickness of your concrete floor slab with the correct support grid lines to keep the framing flat. Slab Spacing Blueprint: The standard spacing blueprint for adjustable steel spans matches your floor slab thickness directly to your maximum horizontal support gaps: Slab Thickness (mm) Max Centering Sheet Support Gap Max Acrow Span Interval Up to 150mm 600 mm center-to-center 1200 mm spacing gap 150mm to 200mm 500 mm center-to-center 1000 mm spacing gap 200mm to 300mm 400 mm center-to-center 750 mm spacing gap When pouring a standard 150mm residential floor slab, your horizontal Acrow spans can safely sit at 1200mm intervals. However, if you are casting a thick 300mm industrial floor or commercial podium deck, the immense weight of the wet mix requires you to tighten your layout. Reducing your primary beam intervals down to 750mm prevents your heavy-duty horizontal framing from bowing or dipping under the dense concrete load. Timber H20 Beam Layout Spacing Matrix for Plywood Shuttering When you substitute traditional sheet panels with modern plywood sheets, your framework calculations must adapt to the flex limits of your materials. Setting up a reliable H20 timber beam layout spacing matrix requires utilizing a smart cross-grid pattern to keep your temporary deck rigid. [Soffit Plywood Sheet] ──> [Secondary Wood Runners (H20 Beams @ 300-400mm Gaps)] ──> [Primary Acrow Spans] Engineered timber H20 beams offer excellent cross-sectional stiffness and high bending resistance, making them a perfect companion for smooth plywood face sheets. In this cross-grid layout, the H20 timber beams serve as your secondary wood runners, sitting directly underneath the plywood sheets at close 300mm to 400mm intervals. These timber runners then transfer their weight down onto your primary adjustable steel spans running in the opposite direction. Expert Tip: Plywood has much more natural flexibility than structural steel plates. Keeping your secondary timber runners spaced tightly at 300mm prevents your plywood face sheets from sagging between support lines, ensuring a perfectly smooth concrete finish. Common Errors: Deflection Limits and Loose Lock Pins The most critical safety risk on a horizontal staging layout occurs when a crew ignores bending moment deflection limits during a pour. Many field teams believe that as long as a telescoping beam fits across a room, it can handle any weight. However, exceeding the maximum load capacity of adjustable steel

Read More »

Formwork Stripping Cycles: Using Drop-Head Systems to Speed Concrete Pours

Managing your formwork stripping time as per IS 456 rules is the true secret to keeping a commercial building project moving fast without risking structural safety. Stripping your under-slab supports too early can cause cracks or sagging, but leaving your equipment locked in place for weeks stalls your crew and drives up rental bills. By utilizing a modular early stripping shoring system equipped with quick-release drop-head components, contractors can safely reclaim their plywood sheets and horizontal beams just days after a pour. This guide explains how to blend concrete curing timelines with modern drop-head mechanics to optimize your layout without cutting safety corners. [Concrete Pour] ──> [Hydration & Heat Generation] ──> [Reaches Compressive Milestone] ──> [Safe Early Strike] When concrete is freshly poured, the raw chemical mix undergoes hydration, slowly building up its internal density and load-bearing strength over several days. Stripping your shuttering sheets too early interrupts this strength-building process, subjecting the immature deck to extreme pulling forces it cannot handle. This mistake leads to microscopic cracks, permanent floor dips, and sudden structural failures. To plan a safe layout rotation without delaying your project timeline, check out our comprehensive guide on Slab Formwork Scaffolding Rental Bangalore Systems. Slab Concrete Deshuttering Periods: Props vs. Soffit Panels A common point of confusion for on-site supervisors is the distinct difference between stripping the horizontal face panels and removing the main vertical props. When evaluating the minimum stripping time for concrete slab formwork, the code divides the process into two separate structural stages to help accelerate your construction cycle safely. Slab Deshuttering Rule: According to IS 456:2000, the minimum stripping time for concrete slab formwork requires stripping the soffit formwork panels after 3 days, provided the vertical props are immediately re-propped underneath the exposed concrete. [Stage 1: Day 3] ──> Strike Soffit Panels (Plywood / Sheets Reclaimed) [Stage 2: Day 7 to 14] ──> Remove Vertical Props (Based on Floor Span Length) This early strike step is safe because the flat soffit panels only hold up the local surface area of the concrete. Once the mix hits its 3-day compression strength milestone, the flat plywood sheets can be lowered and moved out. However, the main vertical props which carry the total downward weight of the entire room span must remain tightly locked in place much longer. For standard room spans up to 4.5 meters, the props must stay for at least 7 days. For wide spans exceeding 4.5 meters, those vertical supports cannot be touched for a minimum of 14 days. The Mechanics of Speed: How Drop-Head Systems Accelerate Pours To meet tight commercial deadlines without violating code timelines, smart contractors rely on an early stripping shoring system. The core component behind this method is the specialized modular drop-head mechanism. Instead of locking the horizontal beams and vertical props together as a single rigid frame, drop-head scaffolding components separate these two elements visually and mechanically. [Normal State: Wedge Tight]             [Struck State: Wedge Released]     ┌───────────────────────┐                    │ Plywood / Deck Sheet  │               ┌─── (Plywood Drops 100mm) ───┐     └───────────────────────┘               └─────────────────────────────┘       ▲  [Drop-Head Plate]  ▲                       [Drop-Head Plate]       ║                     ║                               ║ (Dropped Down)    ═══╬═════════════════════╬═══                 ═══════════╬═════════════       ║   [Horizontal Beam] ║                               ║ [Horizontal Beam]       ║                     ║                               ║    ───╨───────[Prop Head]───╨───             ───╨───────[Prop Head]───╨───               │       │                                 │       │ The device works using a simple quick-release wedge pin or drop-plate assembly located at the top of the vertical support pipe. During assembly, the head is driven up and locked, raising the horizontal support plates flush with the top of the vertical standard. This allows the horizontal beams and plywood shuttering sheets to form a smooth, flat deck surface. After 3 days of curing, a worker strikes the quick-release drop-pin with a hammer. The drop-head plate instantly slides down by roughly 100mm, lowering the primary horizontal beams and plywood panels so they can be removed. Crucially, the central vertical standard pipe remains perfectly undisturbed, staying tightly wedged against the concrete ceiling to keep the slab supported during its final curing stages. How to Reduce Formwork Cycle Times Safely Every project manager wants to know how to reduce formwork cycle times safely to lower equipment rental costs. The fastest way to achieve this is through an optimized shuttering panel rotation plan, which keeps your materials moving rather than sitting idle on a cured floor. When you use a traditional support setup, your entire inventory of props, beams, and sheets is locked under a single floor slab for 10 to 14 days. This forces you to rent double or triple the amount of material if you want to start work on the next level. By introducing drop-head adapters into your staging layout, your team can strip and recover up to 70% of the horizontal framing components within 72 hours. While the vertical shoring props stay behind to carry the curing load, the freed-up plywood and horizontal runners are shifted straight to the upper deck. This quick rotation allows you to maintain a fast, continuous building pace using a fraction of the rental inventory. Common Errors: Stripping Blended Cements Prematurely Without Cube Tests The most dangerous field error on modern job sites is failing to adjust the minimum stripping time for concrete slab formwork when working with modern eco-blended cements. While older construction guides

Read More »

Acrow Spans & H-Beams: Heavy-Duty Deck Support Spacing Calculations

Setting up your horizontal staging is a highly precise step in concrete deck formwork installation. While vertical shoring pipes bear the downward weight to the ground, your horizontal elements form the immediate structural bridge underneath the ceiling shutters. Securing a reliable Acrow span rental Bangalore fleet provides your site team with rigid, telescoping steel beams built to span across distant props. These primary beams support the heavy centering sheets, preventing them from buckling or sagging under a live concrete pour. [Wet Concrete Mix] ──> [Centering Sheets / Plywood] ──> [Horizontal Acrow Spans & H20 Beams] ──> [Vertical Props] When concrete is dropped from a pump line, it creates an intense dynamic horizontal ledger load that spreads across the nearest supports. If your horizontal beams do not match this weight path, the slab centering sheet support system will flex. This minor structural shifting bends the under-face of your slab, resulting in an uneven ceiling line that requires expensive concrete grinding work to fix later. By linking adjustable steel spans with high-quality engineered timber H-beams, you create a rigid horizontal runway that stays perfectly flat. To see how these horizontal bridging components link up with your main vertical layout plans, check out our master overview of Slab Formwork Scaffolding Rental Bangalore Systems. Understanding the Mechanics of Adjustable Steel Spans To safely manage your support grid layout, your site engineers must evaluate how telescoping design features alter the maximum load capacity of adjustable steel spans. A standard Acrow span is built using a two-piece structural framework: a wide outer member sleeve and a slightly smaller inner sliding channel that extends outwards to match your required clear span length. While this telescoping format offers excellent flexibility for variable room sizes across Bangalore job sites, it changes the physical rules of structural loading. The further the inner sliding channel is pulled out from the outer sleeve, the lower the safe weight capacity becomes at the center point. Extending a steel span to its maximum length increases the risk of bending moment deflection limits being breached under a heavy concrete pour. For example, a standard 2.4-meter span might support up to 2000 kg of concrete load when fully closed. However, if you pull that same span out to its maximum 4.0-meter extension without placing an intermediate vertical prop underneath the joint, its safe load capacity drops by more than half. The Spacing Blueprint: How to Calculate Acrow Span and Beam Intervals Calculating the exact gap between horizontal supports is a vital math step for your site engineers. When figuring out how to calculate spacing for Acrow spans in slab casting, you must map out your horizontal grid based on the thickness of the concrete floor. If you place your horizontal spans too far apart, the centering material will bow under the heavy downward pressure, leading to structural errors. [150mm Thick Slab] ──> Wider Span Gaps Allowed (Up to 1.2 Meters) [300mm Thick Slab] ──> Tight Span Gaps Required (Max 0.75 Meters) The primary load calculation requires tracking the weight of the wet concrete mix combined with the adjusting steel span weight loads. To keep your support grid lines perfectly rigid, use this structural span layout table based on standard 1200mm wide centering steel sheets: Slab Thickness (mm) Approximate Wet Weight (kg/m2) Maximum Acrow Span Gap (m) Required Vertical Prop Support Gaps (m) 150 mm ~480 1.2 m 1.2 m 200 mm ~620 1.0 m 1.0 m 250 mm ~760 0.9 m 0.9 m 300 mm ~900 0.75 m 0.75 m When laying out your primary support grid lines, always measure from the center point of each steel span. Tightening these intervals to match your specific slab thickness guarantees a clean horizontal structural layout, keeping the temporary platform rigid during high-volume concrete drops. Timber H20 Beam Layout Spacing Matrix for Plywood Shuttering When your project swaps out metal sheets for premium plywood boards, your setup math must adjust to account for a different type of cross-sectional stiffness. Enforcing a proper H20 timber beam layout spacing matrix is crucial to prevent thin 12mm or 18mm plywood boards from sagging between your primary steel spans. Timber Spacing Rule: The standard H20 timber beam layout spacing matrix requires primary beams to be spaced a maximum of 1.2 meters apart, while secondary wooden runners supporting 12mm to 18mm plywood shuttering sheets must maintain a strict gap between 300mm and 400mm depending on concrete depth. [Plywood Shutter Sheet]   ───────────────────────    ▲  ▲  ▲  ▲  ▲  ▲  ▲    <── [Secondary H20 Runners: Spaced 300mm to 400mm]  ═══════════════════════  <── [Primary Steel Spans: Spaced 1.2 Meters Apart] When setting up your soffit plywood framing, lay your primary H20 timber beams across your vertical support jacks first. Next, place your secondary wooden runners on top, running them in the opposite direction at tight, even intervals. This cross-grid layout ensures that the under-slab plywood stays flat and secure under heavy loads, giving your cured concrete a smooth, professional finish. Common Errors: Deflection Limits and Loose Lock Pins Even with precise spacing math, a horizontal staging layout can fail if field crews overlook small component errors during assembly. When managing a slab centering sheet support system, the most critical risk is exceeding bending deflection limits. If a horizontal span or timber runner flexes just a few millimeters too much under the weight of a live concrete drop, it causes structural shifting across the entire interlocking framework, leading to uneven surfaces. A frequent cause of formwork failure on busy construction sites is using unrated or damaged locking hardware. Every telescoping steel span relies on a heavy-duty high-tensile lock pin to secure the inner sliding channel to the outer member sleeve. On many unmanaged sites, workers mistakenly use makeshift scrap rebar pieces or thin wire coils as replacement pins when the original components go missing. Scrap steel lacks the shear strength required to carry high structural loads; it can warp and snap under pressure, dropping the deck level instantly. To maintain reliable safety factors across your horizontal grid setup,

Read More »

The Contractors Guide to Slab Formwork Scaffolding Rental Bangalore Systems

When building a multi-story building or a commercial property in Bengaluru, pouring concrete floors is a major step. Supporting the immense weight of wet concrete requires moving past standard worker platforms into heavy-duty slab formwork scaffolding rental Bangalore systems. If you use the wrong poles or space them too far apart, the floor can sag, the surface will be uneven, and the whole structure could even collapse. This guide explains how to choose the right concrete support systems, plan your layout, and reuse your rental materials quickly to save money on your next project. Engineering the Deck Support: Selecting Shoring Systems vs. Access Staging A common mistake on busy Bangalore sites is using regular painting or masonry scaffolding to hold up a heavy concrete floor slab. While both use steel pipes and joints, they are built for entirely different jobs. Regular access scaffolding is meant for light loads just a few workers, hand tools, and light materials. On the other hand, a real concrete shoring framework is a heavy-duty support system built to hold up thousands of kilograms of wet concrete during a pour. True concrete shoring focuses on the vertical weight capacity (axial load capacity) of each steel standard pipe. When pouring thick concrete decks for IT parks in Whitefield or large apartments along the Outer Ring Road, the vertical pipes must stand perfectly straight without bending or buckling. [Regular Scaffolding] ──> Made for light platforms (Workers & Tools) [Slab Shoring System]  ──> Made for heavy loads (Wet Concrete Support) Working with professional formwork suppliers in Bengaluru ensures you get strong, certified parts meant for heavy loads. If you are calculating how many base supports you need for your project, look at our detailed breakdown of Ceiling Jack Scaffolding in Bangalore. Key Insight: Regular staging keeps workers safe at heights. Shoring scaffolding keeps the heavy concrete slab from sagging or falling while it cures. Never swap one for the other to save on material counts. Calculating Concrete Dead Loads and Scaffold Spacing Limits To set up a safe, heavy load bearing concrete shoring rental in Bangalore, your team must figure out the weight distribution before putting up any steel props. Spacing the support pipes correctly depends on the thickness of the concrete floor you are pouring. Wet concrete is incredibly heavy it weighs around $2500\text{ kg}$ per cubic meter. When you add the weight of the steel rebars, the heavy shuttering sheets, and the workers moving on top, a standard 200mm thick floor slab presses down with more than $600\text{ kg}$ of weight on every square meter. To prevent the wooden beams and plywood from bending, follow this simple spacing grid based on standard Indian steel tube capacities: Slab Thickness (mm) Approximate Weight Load (kg/m2) Maximum Prop Spacing Grid (m) Recommended Main Beam Spacing (m) 150 mm ~480 $1.2\text{ m} \times 1.2\text{ m}$ 1.2 m 200 mm ~620 $1.0\text{ m} \times 1.0\text{ m}$ 1.0 m 250 mm ~760 $0.9\text{ m} \times 0.9\text{ m}$ 0.9 m 300 mm ~900 $0.75\text{ m} \times 0.75\text{ m}$ 0.75 m If you exceed these spacing limits, the wood and steel will bend under the weight. This causes an uneven ceiling line, creates weak spots in your concrete floor, and can cause the support frames to shift dangerously during the pour. Modular Integration: Leveraging Cuplock for Heavy Slab Staging Layouts For large concrete pours in Bangalore, traditional loose pipes and clamps take too long and carry too much risk. If a worker forgets to tighten a single coupler clamp, that section can fail under pressure. A much faster and safer option is using a slab centering material rent Bangalore framework based on the modular Cuplock system. The big benefit of Cuplock is its fixed, welded cup points. These round steel cups are welded every 500mm on the vertical pipes. They hold up to four horizontal bars at the exact same spot. A top cup is then hammered down tightly, locking the whole grid into a rigid, non-bending frame. [Vertical Pipe] ──> [Bottom Cup Point] ──> [Insert Crossbars] ──> [Hammer-Lock Top Cup] This strong locking system stops the vertical steel pipes from bending outward when heavy weight presses down. Whether you are building high ceilings for office lobbies or large commercial spaces, this interlocking system keeps the structure perfectly straight. To see how these modular cups save labor time and improve safety, read about the Cuplock Scaffolding Advantages in Bangalore. The Early Stripping Trick: Minimizing Your Material Footprint with Drop-Heads To lower your rental bill on high-rise projects, you can use a smart setup known as an early stripping shoring system. This method lets you safely take down and reuse a large portion of your horizontal steel beams and plywood panels just a few days after pouring the concrete. This trick works by using a special component called a “drop-head” at the top of the vertical support standards. The drop-head holds the horizontal wooden or steel beams and the plywood sheets that touch the concrete. [Release Drop-Head Pin] ──> [Beams & Shuttering Drop 100mm] ──> [Vertical Support Pipes Stay Tight] Once the concrete cures for about 3 days (72 hours) and reaches roughly 70% of its target strength, a worker strikes the drop-head pin with a hammer. This drops the horizontal beams and plywood panels down by about 100mm so they can be removed. Crucially, the main vertical support pipes stay tightly in place, continuing to brace the heavy concrete slab until it is completely cured. By using this trick, you can move your expensive horizontal beams and sheets straight to the next floor instead of waiting weeks. This cuts down the amount of material you need to rent by up to 50% and keeps your project moving fast. Risk Mitigation: Preventing Formwork Deflection and Foundation Sinkage A great concrete floor layout is only as good as the ground underneath it. A very common mistake on Bangalore sites is placing heavy support props directly on soft, uncompacted soil. When you drop tonnes of wet concrete

Read More »

Managing Scaffolding Labor in Bangalore: Productivity Tips for Erection & Dismantling

On any major construction site in Bengaluru, labor is the most unpredictable cost variable on your balance sheet. While your material rental rates stay completely fixed, the speed at which your crew handles scaffolding erection and dismantling dictates your true operational margins. Poorly managed rigging teams lead to structural bottlenecks that keep masonry, painting, and glazing crews waiting on the ground. Maximizing your scaffolding labor productivity Bangalore requires a shift from simple supervision to precise workflow synchronization. By calculating real output targets, optimizing ground-to-tier hand-offs, and avoiding common field mistakes, you can significantly trim your project’s total man-hours. This guide delivers actionable strategies to accelerate your assembly cycles, eliminate crew downtime, and protect your bottom line. Benchmarking Output: Tracking Scaffolding Labor Productivity in Bangalore To manage a staging team effectively, you must replace vague guesswork with objective tracking metrics. In the local infrastructure and commercial building sectors, the definitive metric for evaluating efficiency is man-hours per tonne. Tracking how many hours a standard crew takes to safely handle a single tonne of steel ensures your project stays closely aligned with its projected financial targets. When using a standard scaffolding rental calculation in Bangalore to estimate project costs, labor should be budgeted against clear output benchmarks. If your tracking indicates a sudden spike in man-hours on a specific block, the root cause is rarely the physical capability of the workers. Instead, it typically points to a failure in material delivery or an unorganized staging area that forces riggers to waste valuable time hunting for components. Calculating Erection and Dismantling Time Targets Establishing real erection and dismantling time calculation for scaffolding models depends heavily on the specific system deployed on your site. For instance, traditional tube-and-clamp setups generally demand 12 to 16 man-hours per tonne due to the intensive labor required to manually torque individual couplers. Conversely, modern modular systems drastically reduce these targets: Scaffolding System Type Average Erection Target (Man-Hours/Tonne) Average Dismantling Target (Man-Hours/Tonne) Traditional Tube & Clamp 14 Hours 9 Hours Modular Cuplock System 6 Hours 4 Hours By tracking these operational cycles weekly, site engineers can isolate exactly which structural blocks are underperforming and adjust crew allocations before delays compromise the secondary trades. The Two-Zone Workflow: Eliminating Vertical Hand-off Bottlenecks The single largest driver of lost labor time on a high-rise build is the vertical transit bottleneck. Left to their own devices, unmanaged scaffolding crews will often attempt to carry individual pipes up a structural frame one by one. This unorganized approach leads to immediate crew fatigue and leaves high-altitude riggers waiting around idly for materials. To stabilize your scaffolding team efficiency, implement a strict Two-Zone Workflow: [Ground Crew: Log & Pass] ──(Vertical Staging Chain)──> [Upper Tier Crew: Secure & Fix] The Ground Crew (The Passers): Positioned exclusively in the staging yard. Their sole responsibility is sorting components, tracking inventory, and hitching bundled loads to rope lines or material hoists. The Upper Crew (The Fixers): Stationed permanently on the active tier. They never descend to fetch parts; their focus remains entirely on receiving materials and locking connections. This division of labor leverages the massive engineering advantages of modern equipment. For example, the cuplock scaffolding advantages in Bangalore are fully realized when your upper crew can rapidly lock nodes down with simple mallet strikes while a steady, synchronized stream of components moves up from the ground. Managing Fatigue and Climate Shifts in Bengaluru Job Sites Maintaining high-velocity rigging targets requires a practical approach to worker welfare, especially given the micro-climate shifts across Bengaluru’s construction belts. While the city generally enjoys moderate weather, afternoon temperatures during the summer months or the heavy humidity preceding monsoon downpours can severely drain physical stamina. When managing skilled scaffolding riggers in Bengaluru, failing to account for heat exhaustion or sudden downpours triggers a sharp drop-off in late-afternoon output. Schedule intense vertical lifting runs for the cooler early-morning windows between 08:00 AM and 11:30 AM. Additionally, ensure that structured hydration breaks are strictly enforced to maintain steady focus and prevent safety errors caused by physical exhaustion. The Structural Dismantling Sequence: Speed Without Sacrificing Control Dismantling a structural framework is inherently more hazardous than building it. A common, highly damaging field error on local sites is allowing crews to drop components directly onto the ground from high tiers to speed up a tear-down. This shortcut leads to immediate component warping, thread damage on jacks, and high replacement penalties that completely invalidate your initial savings. A high-productivity dismantling workflow relies on a strict reverse-assembly sequence: Step 1: Clear the Debris: Remove all loose building materials, tools, and mortar deposits from the platform boards before unlinking a single pipe. Step 2: Top-Down Removal: Dismantle the structure strictly layer by layer from the top tier downward. Never attempt to remove lower tie-ins or bracings prematurely to clear paths. Step 3: Controlled Lowering: Lower all components down to the ground crew utilizing hand-lines or material hoists. Once grounded, materials must move directly to sorting bins to avoid cluttering the exit gates. Enforcing this systematic approach keeps your components intact, protects your crew, and ensures your final return invoices remain free from unexpected fees. You can minimize these risks by reviewing the most common scaffolding rental mistakes in Bangalore with your crew leaders before teardowns begin. FAQs: Optimizing On-Site Crew Output What is the ideal crew size for a standard double-pole setup? For a standard double-pole layout, an optimized team usually consists of 5 to 6 trained riggers: two workers managing the ground sorting and rigging, two workers passing materials vertically, and two expert fixers securing the active upper tier. Scaling beyond this size without adding clear intermediate staging paths often creates a layout bottleneck where workers crowd each other out. How do sub-contracted crews impact site compliance timelines? If you hire an unverified independent scaffolding contractor Bangalore, they may lack formal training in modern safety standards. This can lead to compliance delays during site inspections. Always verify that your assembly sub-contractors hold recognized safety certifications and understand local municipal height

Read More »

Bangalore Scaffolding Logistics: Reducing Transportation Costs from Peenya to Site

For commercial builders across Bengaluru, procurement isn’t just about the rental rate of the steel—it’s about the cost to move it. Because a significant portion of the city’s heavy machinery and factory infrastructure originates from the industrial belt, managing your scaffolding transportation costs Bangalore requires a strategic understanding of local shipping lanes. If your delivery trucks get stuck in Outer Ring Road gridlock or are forced to wait out city traffic bans, your daily logistics costs will quickly spin out of control. Mastering Bangalore scaffolding logistics means optimizing every trip from the warehouse floor directly to your site gate, ensuring you don’t pay for empty truck space or unnecessary transit delays. This operational guide details how to navigate local traffic choke points, maximize truck payloads, and eradicate hidden leaks from your logistics budget. The Peenya Bottleneck: Why Your Starting Point Impacts the Freight Bill If you are renting access equipment for a commercial project in Bengaluru, your logistics costs are dictated by geographical starting points. The Peenya Industrial Area stands as one of the largest manufacturing and storage clusters in Asia, making it a primary hub for a peenya industrial area scaffolding rental. Dispatching multiple tons of high-grade steel from Peenya to expanding job sites in Whitefield, Electronic City, or Sarjapur requires a precise freight optimization strategy to control your total project margins. The primary driver behind escalating freight expenses isn’t the distance itself; it’s the severe transit friction encountered right at the source. Heavy flatbed trailers face intense bottleneck points trying to clear the Tumakuru Road intersection and the narrow service lanes exiting the industrial sectors. If your hauling team fails to clear these exit paths before the city’s strict commercial vehicle choke periods lock down the grid, your transport vehicles sit idle, accumulating unnecessary driver overheads before they even hit the Outer Ring Road. [Peenya Depot Dispatch] ──(Tumakuru Road Bottleneck)──> [ORR Shipping Lanes] ──> [Project Site Gate] To achieve real efficiency, procurement managers must partner with providers that operate with synchronized load planning. Ensuring that trailers are packed, strapped, and dispatched during low-volume night shifts allows your cargo to clear the primary industrial exit gates smoothly, directly lowering the overall transit hours billed to your account. Navigating the Outer Ring Road (ORR) Heavy Vehicle Restraints Successfully executing large-scale logistics requires strict adherence to local traffic regulations. The Bengaluru Traffic Police enforce specific heavy vehicle transit rules Bangalore that completely prohibit the movement of commercial goods carriers during peak commuter rushes. Ignoring these legal transit windows results in steep traffic penalties, delayed crane crews, and trailers being forced to park on highway shoulders for hours. The baseline weekday restrictions bar heavy goods vehicles from entering or moving across major city arteries from 07:00 AM to 11:00 AM and 04:00 PM to 10:00 PM. Furthermore, special Saturday rules shift these no-entry hours from 10:00 AM to 02:30 PM and 04:30 PM to 09:00 PM. Local Enforcement Reality: Missing an open transit slot by even fifteen minutes means your flatbed will be held at a police checkpoint outside the city borders. This oversight forces your onsite assembly team to sit idle on your payroll while waiting out the six-hour road-entry ban. Payload Maximization: Choosing the Right Commercial Fleet A major drain on your scaffolding transportation costs Bangalore comes down to basic math: under-utilizing your truck classification. Transporting a partial load on a heavy-duty multi-axle vehicle means you are paying to haul empty air. To control your freight per trip, you must match the physical weight and material volume of your scaffolding components to the exact legal payload capacity of the dispatched vehicle. Before booking transport, cross-reference the tonnage of your order. A standard 14-foot open truck can efficiently carry up to 4 tonnes of material, making it ideal for smaller maintenance or finishing projects. For major slab pours or structural frameworks, moving up to a 6-wheeler (9 tonnes) or a 10-wheeler flatbed (16 tonnes) ensures you maximize the space per run. Using an accurate scaffolding rental calculation in Bangalore before dispatch guarantees that every component from base jacks to ledgers is grouped tightly, preventing you from paying premium rates for a heavy truck that is only half full. The Financial Trap of Fractional Shipments (LTL vs. FTL) Poor inventory planning often forces site managers into the costly trap of fractional or partial shipments. If a project engineer forgets to include foundational walk-boards or couplers in the primary order, a secondary vehicle must be sent out just to deliver the missing pieces. This results in high transport overheads that could have easily been avoided. Shipment Type Cost Structure Site Impact Budget Efficiency Full Truckload (FTL) Flat rate per trip All materials arrive at once; assembly begins smoothly. High ROI Less-Than-Truckload (LTL) Variable/Premium rates Phased drops cause crew downtime waiting for parts. Low Efficiency Relying on multiple partial deliveries multiplies your gate reception labor, increases your exposure to city toll charges, and splits your inventory tracking across several confusing delivery challans. Hidden Logistics Leaks: Detention Fees and Breakdown Turnarounds Many builders review their freight invoices and are shocked by extra line items like demurrage charges and detention fees. These leaks happen because of ground-level site delays. If a flatbed arrives from Peenya and has to wait for three hours because the unloading zone is blocked by a concrete mixer, the transport company will rightfully charge you for vehicle standby time. To protect your budget against these hidden leaks, always clear your site’s unloading layout before the truck arrives at the gate. Furthermore, check your vendor’s policy on vehicle breakdown turnarounds. If a delivery vehicle suffers a mechanical failure or tire blowout on the highway, a professional vendor should guarantee a swift backup vehicle replacement to minimize your crew’s idle downtime. Avoid common scaffolding rental mistakes in Bangalore by clarifying transport contract terms and liability clauses before signing your lease agreement. FAQs: Tackling Heavy Transit in Bengaluru Roads Does a centralized vendor location lower freight fees? Yes, significantly. Choosing a supplier with a

Read More »

Mastering Scaffolding Workflow: How to Manage Material Mobilization on Large Sites

When a multi-ton flatbed truck rolls onto a major construction site in Bangalore, the clock starts ticking. If your team doesn’t have a strict plan for scaffolding material mobilization Bangalore, day one easily devolves into absolute chaos. Components get dumped in the wrong zones, vital coupling pins get buried under heavy steel standards, and your crane operators waste hours double-handling the same inventory. Streamlining your scaffolding workflow management from the very first delivery is the only way to protect your timeline. For large-scale commercial layouts and infrastructure builds, a successful setup depends entirely on how you receive, sort, and distribute your equipment before the assembly crew even picks up a hammer. This operational blueprint shows you exactly how to structure your staging yard, build an airtight receiving log, and clear last-mile bottlenecks before assembly starts. The Mobilization Blueprint: Mapping Your Staging Yard Before the first delivery truck even pulls up to the gate, you need a clear scaffolding mobilization plan marked out on your site layout. On major projects across Bengaluru, ground space disappears fast once excavation finishes and structural work peaks. If you don’t allocate a dedicated construction site staging area early on, unbonded materials will end up scattered wherever there is an empty patch of earth, leading to massive inefficiencies later. An effective layout relies on creating clear, sequential drop zones that mimic a small assembly line. When trailers arrive, they must offload in a designated area that doesn’t block incoming concrete mixers or material hoists. From there, components should flow smoothly through sorting directly to the base of the structure. [Trailer Unloading Zone] ──> [Component Sorting Yard] ──> [Hoist / Lift Base] Failing to set up this raw storage yard properly means your team will spend hours moving the same pipes multiple times just to clear paths for other trades. When sourcing your equipment from professional scaffolding rentals in Bangalore, sharing your yard footprint with the logistics team ensures they drop the heavy bundles exactly where your rigging crew needs them. Zoning for Access: Organizing Standards, Ledgers, and Accessories Effective large site material handling requires strict structural zoning within your yard. The most common mistake on day one of mobilization is letting heavy vertical standards get dumped on top of the smaller ledger pipes or base jacks. This causes immediate component burial, forcing workers to dig through tons of steel just to find the foundational parts needed for the very first lift. Your material yard layout should stack vertical standards closest to the hoist zone, while horizontal ledgers are grouped by length right behind them. This sequential arrangement keeps component tracking accurate and speeds up daily allocation to the upper floors. Expert Tip: Protect Your Small Parts Always allocate a covered, secure zone or locked pallets for smaller accessories like couplers, pins, and joint pins. These items are highly vulnerable to moisture build-up during sudden downpours and are the easiest assets to lose track of on a busy site. Keeping them in clearly labeled, dedicated storage zones ensures they remain clean, organized, and ready for use. Synchronizing the Drop: Workflow Integration with Heavy Machinery Efficient scaffolding workflow management relies on matching your delivery schedule with your on-site heavy machinery availability. On large commercial projects, tower cranes and material hoists are always in high demand. If a flatbed trailer loaded with tons of steel pipes arrives without a pre-scheduled lifting slot, it will sit idle in the offloading layout, driving up lead times and racking up detention charges from the transport company. Before scheduling the drop, the project manager must coordinate the crane hoisting sequence to ensure the rigging team is ready the moment the vehicle arrives. Bundles of scaffolding must be bound with certified rigging points so they can be hooked up and hoisted directly to their designated storage levels or assembly tiers. This straight-to-destination approach bypasses the need for ground-level storage entirely. For projects utilizing heavy structural frameworks, such as a heavy duty shoring bridge support Bangalore installation, synchronizing these massive structural loads with crane availability is critical to preventing a total standstill in your site’s traffic loop. Handling Last-Mile Access Bottlenecks in Bengaluru’s Outer Zones Executing smooth scaffolding material mobilization Bangalore becomes increasingly difficult when dealing with mega-sites located in rapidly expanding outer zones like Whitefield, Electronic City, or the northern airport corridors. While these areas offer massive project footprints, their approach roads are often unpaved, narrow, or restricted by local municipal transit windows. Managing the final stretch of delivery logistics requires a deep understanding of your transport vehicle’s turning radius. A long multi-axle trailer cannot navigate tight, mud-slick dirt tracks without getting stuck or damaging nearby property. These physical site access constraints make it essential to map out your vehicle route beforehand. Common Mistake: Blind GPS Dependency A frequent mistake made by logistics teams is relying on standard digital navigation maps to route heavy flatbeds toward newer IT park extensions. These maps often direct long trailers down narrow village roads completely unsuited for heavy commercial vehicles. Always conduct a physical route scout 48 hours prior to delivery. The Inventory Receiving Log: Preventing Day-One Shortages An inventory receiving log for scaffolding is a structured field document used by site engineers to cross-check incoming equipment counts against the vendor’s delivery challan before offloading. It serves as an official onsite record to catch quantity shortfalls, component mismatches, and material damages instantly, preventing costly billing disputes at the end of the construction cycle. Without rigorous quantity verification at the gate, tracking hundreds of smaller items like pins, base jacks, and couplers becomes impossible once they disappear into the staging yard. A common gap in component tracking occurs when teams sign off on a delivery challan based on a quick visual guess rather than an itemized count. If your vendor sent 450 ledger pipes but the paperwork states 500, that unaccounted deficit will be flagged as a lost item when you return the gear. This oversight is one of the most frequent scaffolding rental mistakes in Bangalore. To

Read More »

Scaffolding Project Management: Optimizing Site Logistics, Labor, and Rental ROI

In the high-pressure world of Bangalore’s construction sector, scaffolding is often treated as a simple commodity just some pipes and boards to be rented at the lowest rate. However, veteran managers know that the true cost of access isn’t the rental price; it’s the efficiency of the operation. Effective scaffolding project management Bangalore is the difference between a site that runs like clockwork and one that loses lakhs in labor delays and logistics bottlenecks. This guide explores how to master site logistics, cut labor downtime, and ensure every rupee spent on your rental maximizes your project’s ROI. The Logistics of Height: Streamlining Material Movement When managing a high-rise project in a congested hub like Bengaluru, the biggest challenge isn’t just getting the equipment to the gate; it’s getting it to the 20th floor without clogging up the entire site. Scaffolding site logistics is essentially a vertical transport problem. If your material handling isn’t synchronized with your crane or hoist schedule, you end up with expensive equipment sitting idle on the ground while your labor force waits at height. This delay ripples through the entire project timeline. Strategic scaffolding rental in Bangalore requires planning for mobilization and demobilization long before the trucks arrive. In narrow urban zones like Indiranagar or MG Road, truck entry timings are strictly regulated. A project manager must coordinate these windows to ensure that lead times are accounted for and that unloading doesn’t happen during peak traffic hours, which can result in heavy fines or turned-away deliveries. Just-in-Time (JIT) Delivery: Reducing On-Site Clutter On a crowded job site, floor space is premium real estate. Traditional construction site logistics often involve dumping all components at once, which leads to “material burial” where the pieces you need first end up at the bottom of the pile. Just-in-Time (JIT) delivery solves this by staggering equipment arrival according to the erection sequence. By utilizing small, staged deliveries, you maintain a clear staging area and reduce the risk of inventory loss. For example, delivering only the standards and ledgers for the first few lifts ensures your crew can start immediately without tripping over specialized brackets or walk-boards that won’t be needed for another two weeks. This keeps inventory tracking simple and prevents site clutter from becoming a safety hazard. Key Insight: Vertical logistics is the heartbeat of height access. By synchronizing equipment delivery with your hoisting capacity and using JIT principles, you eliminate the “wait time” that often kills productivity on Bangalore high-rises. Optimizing Labor: Cutting Down Assembly and Dismantling Times In any major construction budget, labor is usually the most volatile variable. While the rental price of the steel is fixed, the cost of the people putting it together can skyrocket if the process is inefficient. Construction labor optimization in scaffolding is all about reducing the total man-hours required to reach a specific height. If your crew is spending hours searching for the right pins or struggling with heavy, non-standardized components, your project schedule is already at risk. Efficient project management focuses on the “Ease of Assembly.” By selecting systems that prioritize speed, you can significantly reduce the size of the crew needed on-site. In the Bengaluru market, where skilled labor can be hard to source during peak seasons, reducing the technical complexity of the build is a strategic move. A faster double pole assembly in Bangalore means your masonry or painting teams can get to work sooner, keeping the entire project lifecycle on track. System Scaffolding vs. Traditional: The Labor ROI Impact When calculating your scaffolding rental ROI, the choice between traditional pipes and fittings versus modern system scaffolding is the biggest factor. Traditional “tube and clamp” systems offer flexibility but are labor-intensive, requiring highly skilled riggers to ensure every joint is secure. On the other hand, system scaffolding like Cuplock uses pre-engineered locking points that eliminate most of the guesswork. The data is clear: system scaffolding can be erected up to 30% to 50% faster than traditional methods. For a project manager, this translates to massive savings in daily wages. While the daily rental rate for Cuplock might be slightly higher, the reduction in man-hours usually results in a much lower total cost. Highlighting the cuplock scaffolding advantages in Bangalore often shows that the speed of the “node” connection allows a smaller team to cover more square footage per day than they ever could with manual clamps. Calculating the Real ROI of Your Scaffolding Rental Many procurement teams in Bangalore fall into the trap of choosing a vendor based solely on the lowest monthly quote. However, the true scaffolding rental ROI is a measure of how that equipment facilitates or hinders your project’s progress. To get an accurate picture, you must look at the “Cycle Time”: the speed at which a scaffold can be erected, used, moved, and dismantled. A cheap system that is slow to move actually costs more in crane time and site overheads than a premium system that stays ahead of your masonry schedule. Using a proper scaffolding rental calculation in Bangalore helps you see the bigger picture. High asset utilization is the goal. If a scaffold stays on-site for six months but is only active for three, your ROI is effectively halved. A well-managed project ensures that the moment a section of work is finished, the equipment is demobilized or moved to the next block to stop the rental meter. The Scaffolding ROI Formula: $$\text{ROI Factor} = \frac{\text{Value of Project Time Saved} + \text{Labor Costs Reduced}}{\text{Total Rental Cost} + \text{Logistics Fees}}$$ Hidden Costs: Managing Loss Prevention and Damage Charges One of the most common drains on a construction budget occurs during the final “off-hire” count. Inventory tracking is critical because small components like pins, clamps, and base jacks are easily lost or buried in debris. Without a systematic way to log material as it arrives and leaves, you might find yourself facing significant “loss and damage” charges. Modern inventory tracking involves clear material logging during every mobilization and demobilization stage. By designating a specific,

Read More »

Monsoon Scaffolding Safety: Protecting Bangalore Sites from Heavy Rain & Soil Sinking

Bangalore’s monsoon season brings more than just a break from the heat; it brings a serious test for every construction site in the city. Between June and September, the famous red laterite soil can flip from a solid foundation to a sinking hazard in a single afternoon. For site managers, monsoon scaffolding safety Bangalore isn’t just a line in a manual it’s the difference between a productive shift and a structural collapse. When water saturates the ground, it eats away at the stability of your rig, making proactive rain protection a top priority. The Danger of ‘Soft Ground’: Why Bangalore Soil Sinks During Rain That hard-packed red soil we see across Bangalore gives a false sense of security during the dry months. Once the heavy rains hit, the soil bearing capacity drops like a stone. When the earth becomes waterlogged, it loses the “grip” needed to support thousands of kilograms of steel and workers. This is the root cause of uneven settlement where one side of the scaffold sinks just a few centimeters more than the rest. That tiny shift is enough to throw the whole structure out of verticality, risking a total foundation failure. Sole Plates and Base Plates: Your First Line of Defense Preventing scaffolding from sinking starts with changing how you think about the foundation. In summer, a standard metal base plate works fine. In the monsoon, that plate acts like a needle in soft butter. To stay upright, you must use timber sole plates or steel spreaders to distribute that weight over a much larger area. By placing a thick timber plank under the metal base, you “float” the scaffold on top of the mud, keeping the poles from piercing the wet topsoil. For high-stakes projects in 2026, safety protocols now lean toward double-thickness sole plates on well-compacted ground. This level of care is a hallmark of advanced infrastructure scaffolding Bangalore standards. Without these plates, the vibration of daily work will eventually drive your structure into the mud as the rains get heavier. Key Insight: Never put a base plate directly on raw red soil during the monsoon. A sole plate is a structural bridge that turns a dangerous point-load into a safe, distributed weight. Managing Wind Loads during Bangalore’s Pre-Monsoon Thunderstorms The monsoon usually arrives with violent evening squalls. These thunderstorms bring high-velocity gusts that put massive lateral force on a scaffold. While scaffolds are built to hold weight down, they are surprisingly weak when pushed sideways. If your rig isn’t tied in correctly, these wind loads can pull the whole system away from the wall or cause the frame to buckle. To keep your scaffolding stability in heavy rain and wind, 2026 norms have upped the requirements for wind bracing. Standard diagonal braces aren’t enough for high-rises anymore. You now need high-tension plan bracing and more frequent “tie-ins” to the building. These act as anchors, stopping the wind from swaying the scaffold and keeping the couplings from vibrating loose during a storm. The ‘Sail Effect’: Safety Netting and Wind Stability One of the biggest hidden risks in scaffolding wind load safety is your green safety netting. It’s great for stopping falling tools, but it acts like a giant sail in a storm. This “sail effect” catches the wind and transfers all that pressure directly into the scaffold’s frame. Modern wind resistance strategies now use “releasable ties” or breakaway clips for all netting. These are designed to snap when the wind hits a dangerous speed, letting the netting flap freely instead of pulling the scaffold down. Keeping your lateral stability means making sure your debris netting doesn’t become your biggest liability during a June downpour. The 2026 Monsoon Safety Checklist for Site Managers By 2026, a verbal “it looks fine” won’t pass an inspection. To stay in IS 3696 compliance, you need a solid monsoon scaffolding safety checklist 2026. This is about proactive stability checks before anyone starts work. Heavy rain can change the safety of a site overnight, making daily inspections a hard requirement. Your checklist should focus on the ground and the anchors. Check that water is moving away from the base, that sole plates are still level, and that there’s no “puddling” near the legs. You also need to check the torque on couplings, as the high humidity can actually cause some joints to settle or loosen. Post-Storm Inspections: What to Check After a Downpour The impact of heavy rain on scaffolding is often invisible until it’s too late. After any big storm in Bangalore, a post-storm inspection is a must. Start with a plumb check to verify the verticality. Rain-soaked soil can cause a “lean” that’s hard to see without a level, but even a slight tilt drastically cuts the scaffold’s load capacity. Look for soil erosion under the base plates. Even with sole plates, running water can wash away the earth underneath, leaving the scaffold “floating.” Check every coupling and make sure the walkboards haven’t warped or become dangerously slippery. If the wind was high, double-check the wall ties; any movement there means the scaffold isn’t safely bonded to the building anymore. Key Insight: A post-storm inspection is a full re-certification. Don’t let anyone back on the platform until the plumb and verticality are verified by a pro. Corrosion & Rust: Maintaining Metal Integrity in High Humidity While sinking ground is the immediate worry, Bangalore’s humidity is a long-term threat. Constant moisture leads to oxidation, and without proper rust protection for scaffolding, steel components start to rot. Rust isn’t just ugly; it’s a sign the metal is losing its strength. Most quality rental fleets use galvanized steel with a Zinc coating to fight this off. However, that coating can wear thin at the joints and threads where metal rubs together. This leaves the raw steel open to the damp air. Pay close attention to coupling maintenance. The moving parts in couplers are magnets for joint seizure. Moisture gets into the threads, rusts, and “freezes” them. This makes it impossible

Read More »

Contact Us